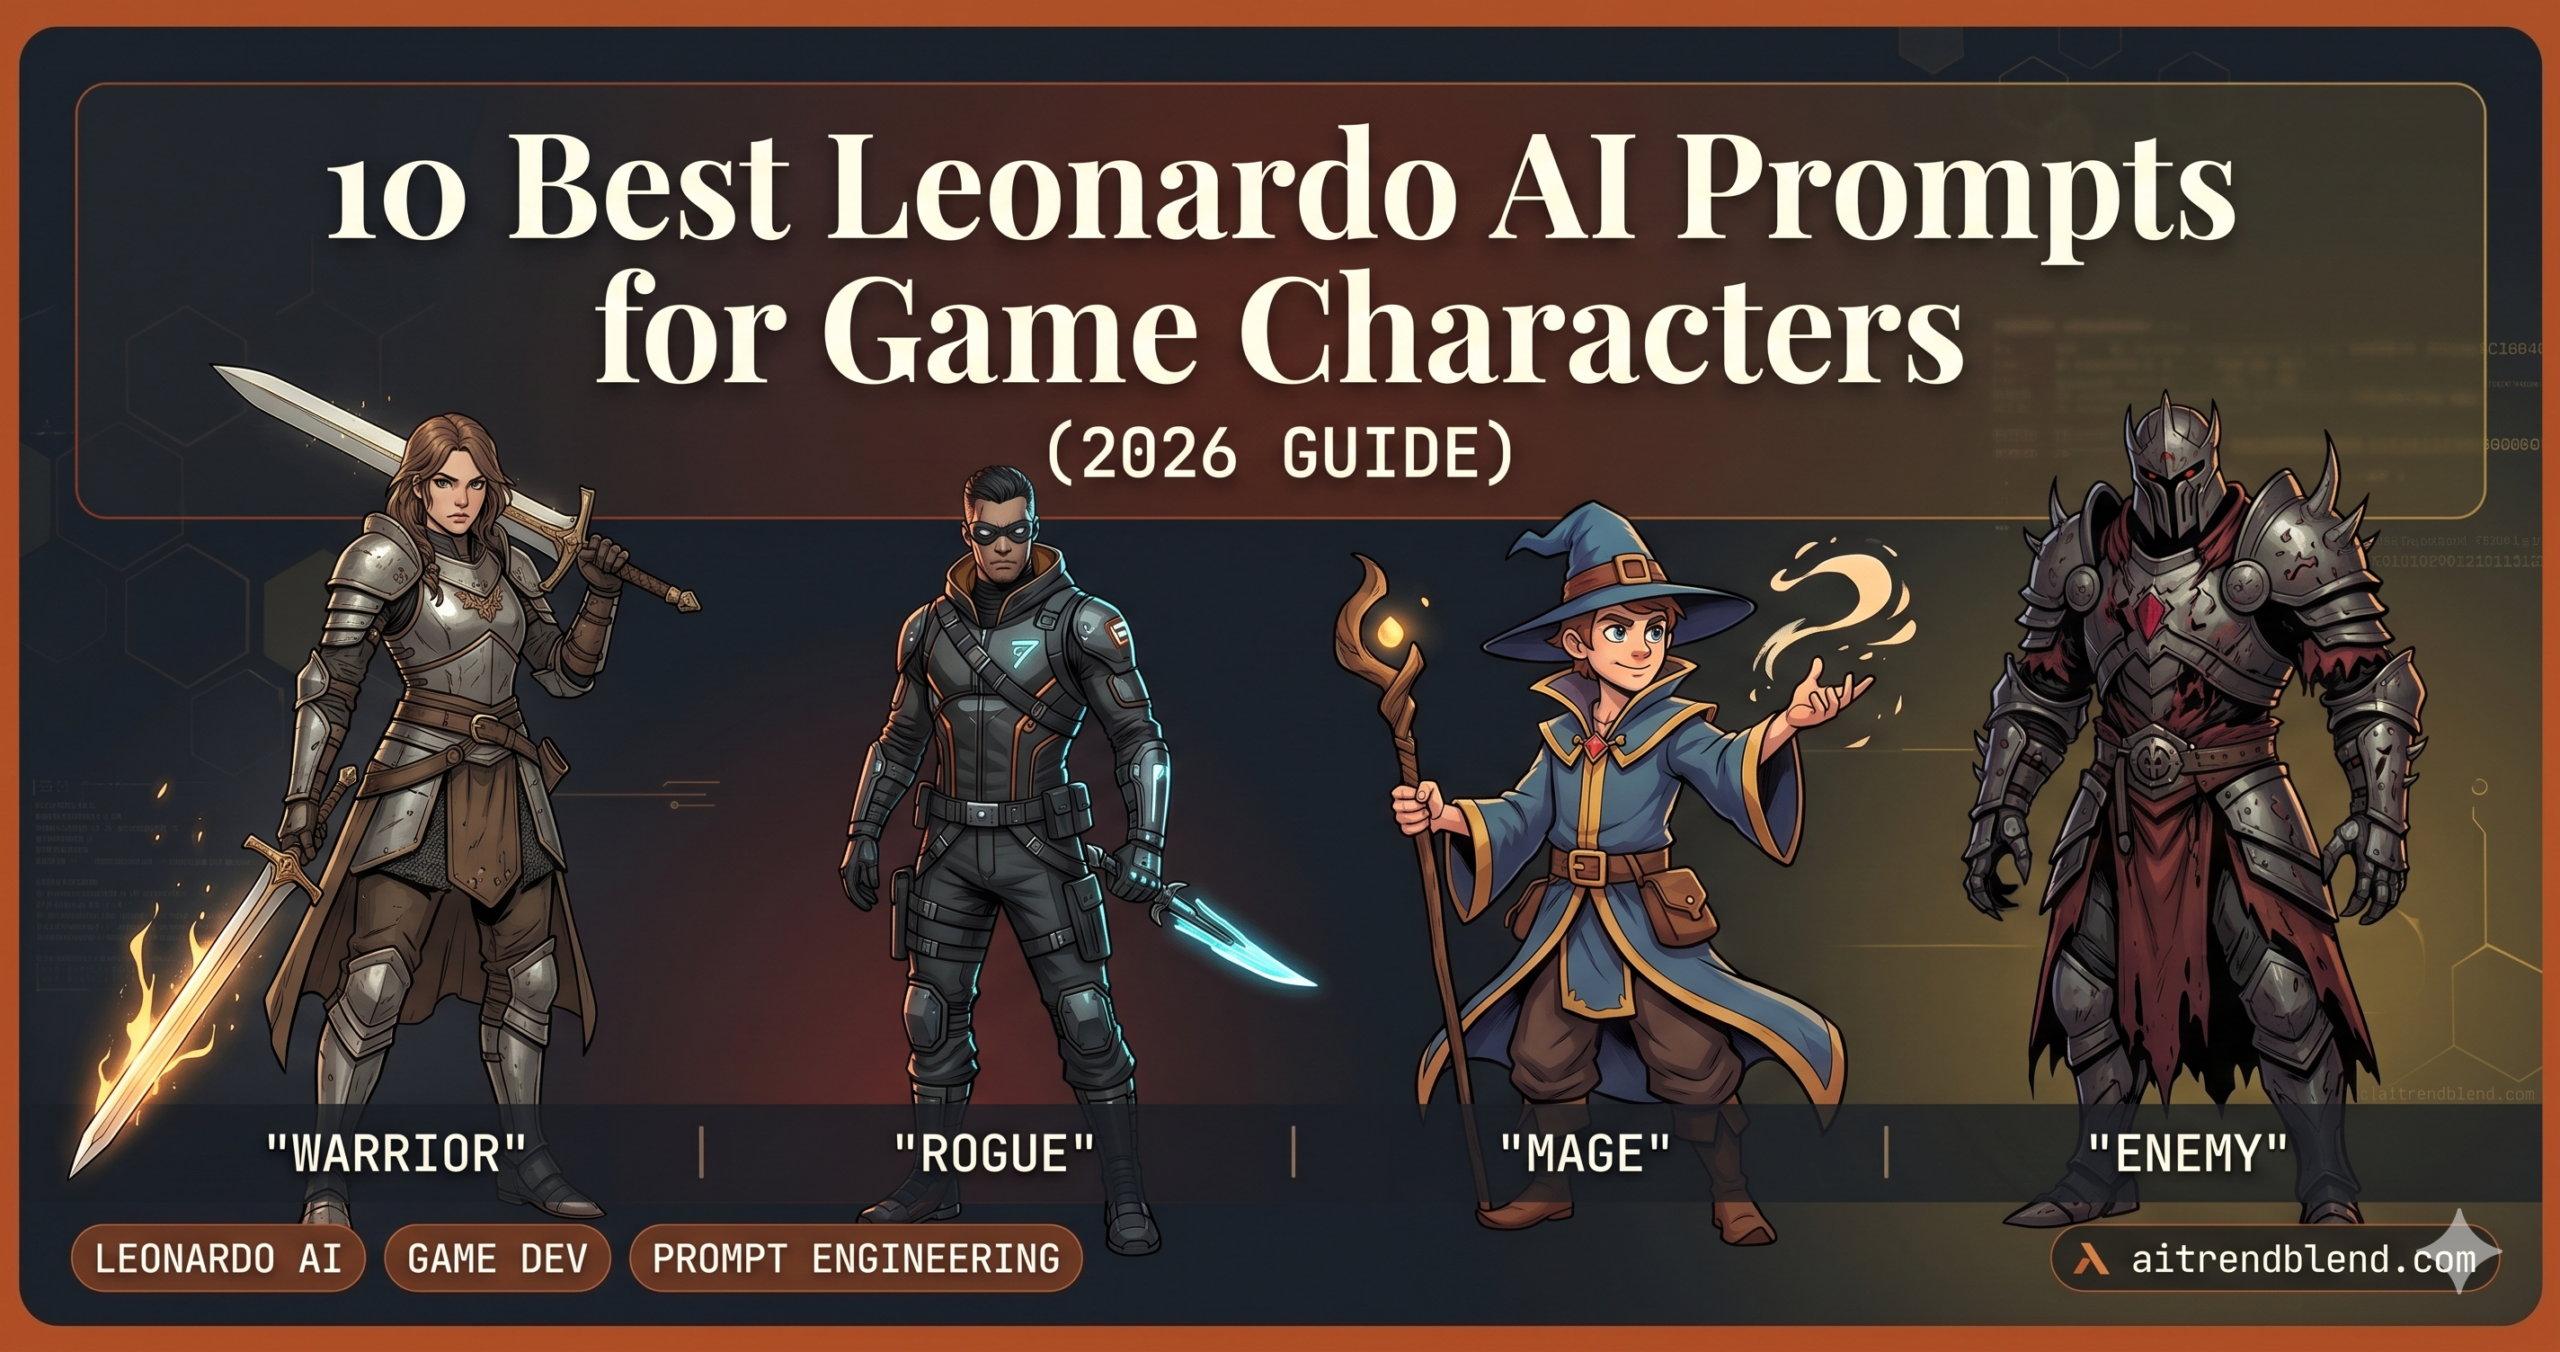
10 Best Leonardo AI Prompts for Game Characters (2026 Guide)
That gap, between what Leonardo AI produces by default and what game developers actually need, is exactly what this guide closes. Leonardo AI is one of the few AI image tools built with game developers explicitly in mind, and when you prompt it correctly, it is capable of generating character art that goes from generation to engine with minimal cleanup. The problem is that most people treat it like a general-purpose image generator and get general-purpose results.
Every prompt in this guide was built around Leonardo AI’s specific model behavior, its Image Guidance system, its Canvas tools, and the way its Phoenix and Kino models respond to character art instructions. You will not find vague suggestions here. Each prompt is structured to work, and each one comes with an honest explanation of what the structure is doing and where Leonardo AI will still push back on you.
Whether you are building a solo indie project and doing all the art yourself, or you are a developer who needs to generate character concepts to hand off to an illustrator, these prompts will save you real hours. By the end, you will understand not just what to type, but why each part of the prompt matters, which means you will be able to adapt these for any game character you need to build.
Why Leonardo AI Handles Game Characters Differently
The problem most people run into with other AI art tools is that they were not built with game pipelines in mind. Midjourney produces beautiful images but treats consistent character generation across multiple poses as an afterthought. DALL-E 3 interprets prompts creatively in ways that make it hard to get repeatable results. Stable Diffusion gives you total control but demands substantial technical setup before you get production-quality output.
Leonardo AI sits in a different position. Its Image Guidance feature, which lets you feed in a reference image and control how strongly the model follows it, is one of the most practical tools for character consistency available in any web-based platform. Its Alchemy upscaler preserves fine character detail at high resolution in a way that Midjourney’s upscaler often softens. The ability to train a private model on your own character art is the feature that sets it apart from everything except Scenario.gg, and Leonardo’s UI is significantly more approachable for developers who are not deep into image generation workflows.
That said, Leonardo AI is not a magic character factory. Its default behavior without structured prompts leans toward highly detailed, painterly images with complex backgrounds, the opposite of what most game pipelines need. The Phoenix model handles character anatomy and clothing detail well but can produce inconsistent face topology across generations. The Kino XL model produces film-quality character portraits but can struggle with full-body poses at anything other than a medium shot. Knowing which model to use, and structuring your prompt to counter the tool’s defaults, is the entire game here.
Leonardo AI’s biggest advantage over competitors is character consistency through Image Guidance and custom model training, not raw output quality. Midjourney may produce more visually striking single images. Leonardo’s edge is that you can generate 40 characters and have them all feel like they came from the same art bible, which is what game production actually requires.
Before You Start: How to Get the Best Results from Leonardo AI
Three settings matter more than anything else before you type your first prompt. First, model selection: for full-body game characters, use Phoenix v1 for painterly or hand-drawn styles, and Kino XL for cinematic realism. The default Leonardo Diffusion XL model is good for concept sketches but inconsistent for production character art. Second, image dimensions: set your aspect ratio intentionally, 2 by 3 portrait for character cards, 1 by 1 for bust portraits, 16 by 9 only for environment-character compositions. Third, Guidance Scale: Leonardo’s guidance scale controls how literally the model follows your prompt. For character art, a value between 7 and 10 typically produces the best balance between prompt adherence and visual quality. Going above 12 introduces artifacting, and below 5 gives the model too much creative latitude.
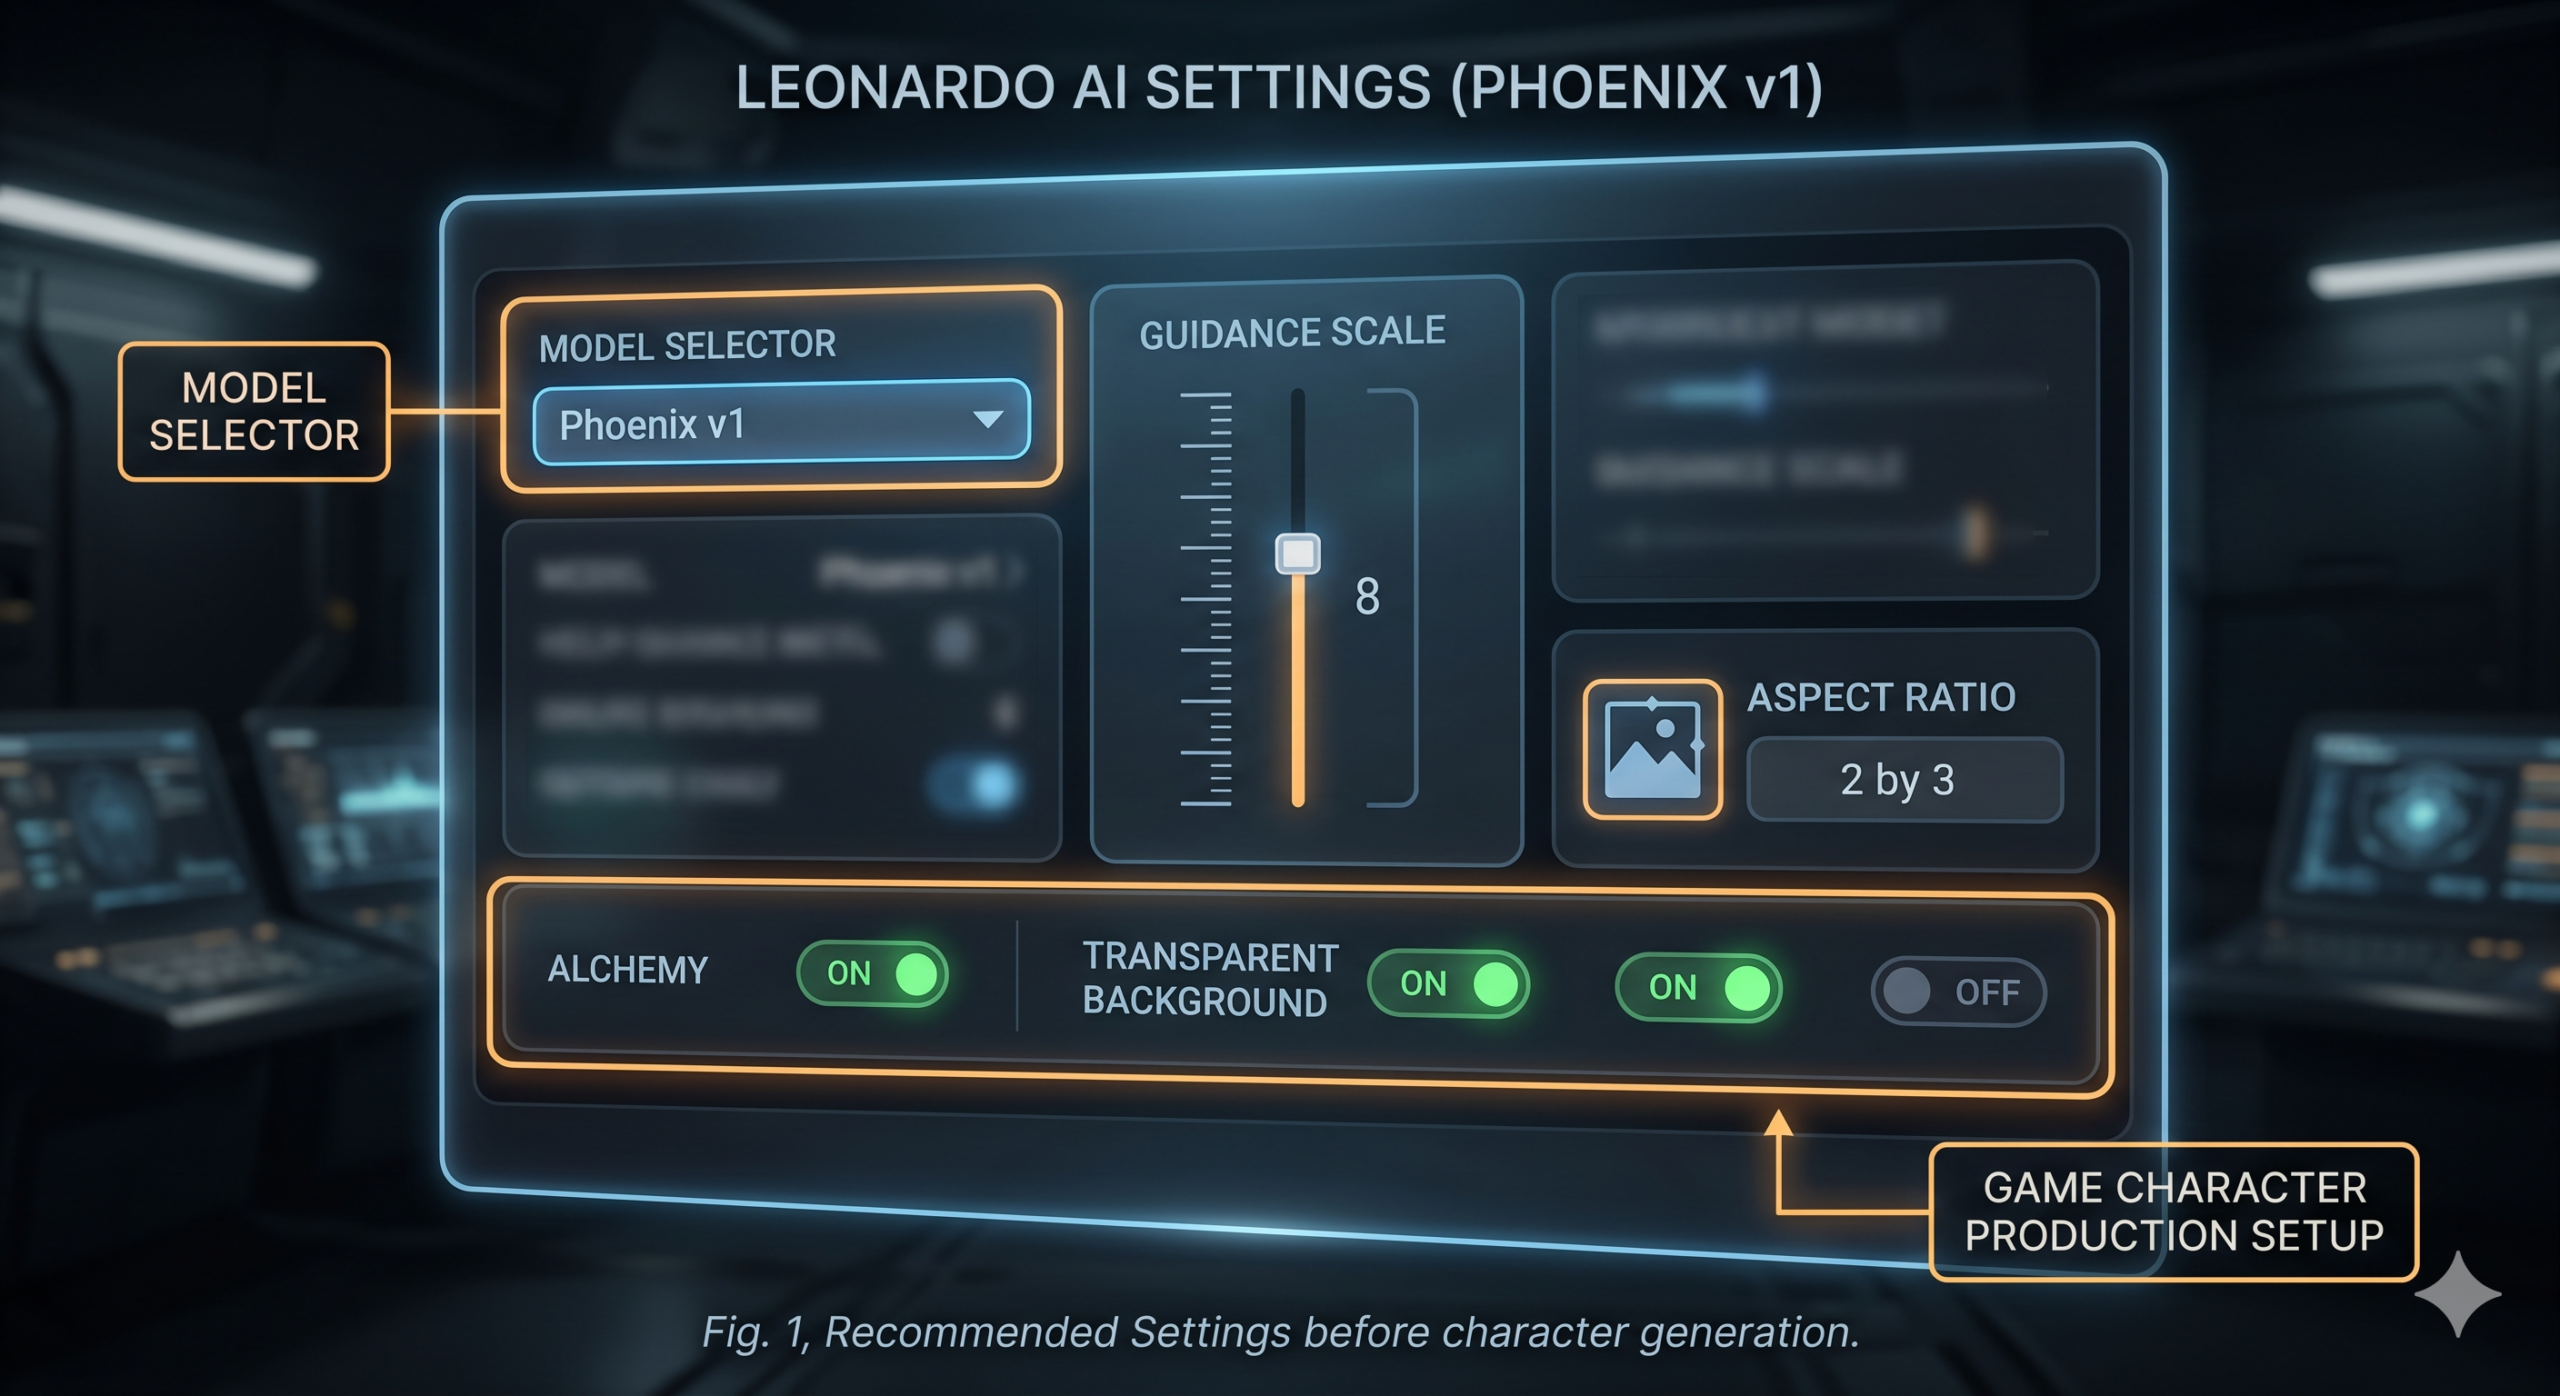
Two features most users miss: the Transparent Background toggle in the Image Settings panel automatically removes the background on generation, which is the single most practical time-saver for sprite work. And the Prompt Magic slider, available with Alchemy enabled, affects how much the model interprets versus executes your instructions. For game characters where you want precise results, keep Prompt Magic off or at its lowest setting. The prompts in this guide are written to work without Prompt Magic, so you get consistent results across model updates.
Before pasting any prompt below: select Phoenix v1, set Guidance Scale to 8, enable Alchemy, enable Transparent Background if you need a game-ready sprite, and set your aspect ratio to match the character type. Doing this once before a generation session eliminates the most common failure modes before you type a single word.
The 10 Best Leonardo AI Prompts for Game Characters
1 Prompt 1: The Clean Hero Sprite
Start here if you have never generated a game character before. This prompt is deliberately simple, one part, no chaining, and structured to override Leonardo AI’s strongest default behavior: placing characters in elaborate environments. The biggest frustration for new users is generating a great-looking character that is completely buried in background detail. This prompt kills that problem at the source.
It works especially well with Leonardo’s Phoenix v1 model and produces results that need minimal background removal because the background is explicitly prohibited in the prompt. For an indie developer who needs a protagonist design before an art style has been fully established, this is the fastest path to something usable.
Why It Works: “Arms relaxed at sides” is one of the most specific and useful instructions you can give for a hero sprite. Leonardo AI defaults to dynamic action poses, raised weapons, dramatic stances, which look exciting but are nearly impossible to use as a base sprite. The relaxed stance gives you something you can actually animate from. “Strong readable silhouette” is a direction note that pushes the model toward bolder shapes rather than blending the character outline into environmental detail.
How to Adapt It: For an enemy character rather than a hero, replace “arms relaxed at sides” with “aggressive stance, weapon raised, slight forward lean” and change “clean linework” to “rougher edges, worn costume, battle damage.” The structural prompt stays identical, you are just swapping the character personality signals.
2 Prompt 2: The Pixel Art Sprite
Pixel art is the style where most AI tools fall apart, and where getting the prompt right matters most. Leonardo AI’s Phoenix model was not specifically trained on pixel art, so without explicit guardrails, it produces something that looks pixel-adjacent, soft, slightly blurred, with gradients that would never appear in real pixel art. The prompt below builds those guardrails directly into the instruction set.
What makes this different from a general pixel art prompt is the negative instruction strategy. You cannot just tell Leonardo AI what you want, you have to actively tell it what to avoid, because its training pulls strongly toward things like anti-aliasing, smooth gradients, and photographic shading that contradict pixel art’s visual grammar.
Why It Works: The negative prompt here is doing as much heavy lifting as the positive prompt. “Anti-aliasing” and “gradient” are the two most important negative instructions, they target Leonardo’s default rendering behavior directly. The console-era reference (NES, SNES, GBA) gives the model a cultural anchor for what limited palette pixel art actually means rather than leaving it to interpret freely.
How to Adapt It: For a full character animation sheet, add “sprite sheet, 4 frames of walk cycle, side-view, horizontal layout” to the positive prompt and “portrait orientation” to the negative prompt. This will not produce frame-perfect animation but gives you directional frames that can inform a hand-animated sprite.
3 Prompt 3: The NPC Portrait
Not every game character needs a full body. Dialogue-driven games, visual novels, and RPGs with conversation menus often need bust portraits, a character from roughly the waist up, expressive, with a face that reads clearly at small sizes. This is one of the cases where Leonardo AI genuinely excels without much coaxing.
The trick with NPC portraits is specifying emotional expression clearly and framing the shot explicitly. “Bust portrait” is not always enough, Leonardo will sometimes interpret this as a full body at medium distance. “Frame the shot from chest to top of head” removes ambiguity and consistently produces the composition most games need for a dialogue portrait.
Why It Works: “Readable at 200x200px resolution” is a prompt instruction with a real technical effect, it primes Leonardo to prioritize facial clarity, bold features, and strong contrast over fine environmental detail. Specifying the character’s facing direction is critical for dialogue systems where portraits need to face toward the text or toward an opposing character on screen.
How to Adapt It: Generate six expressions of the same NPC by keeping every other instruction constant and changing only the expression descriptor. Use Leonardo’s Image-to-Image feature with the first portrait as a reference image and a strength setting of 0.35, this maintains costume and facial features while allowing expression variation. This is more reliable than regenerating from scratch each time.
4 Prompt 4: The Character Class Set
Here is where it gets interesting. Most game character systems need multiple classes or roles, warrior, mage, rogue, archer, that all look like they inhabit the same world even if they have different costumes and silhouettes. Getting a visually coherent class set from a single AI session is one of Leonardo AI’s genuine strengths when you set it up correctly.
The key is establishing the visual grammar first, the art style, lighting direction, color palette temperature, and background treatment, and then applying it consistently across characters by locking those variables while changing only the class-specific details. Leonardo’s Image Guidance lets you use a completed character as a style reference for the next one, which is more reliable than repeating the same style instructions and hoping for consistency.
Why It Works: “Same lighting angle: rim light from upper right” and “same character height and proportions across class variations” are the two instructions doing the most work for cross-class consistency. Without explicit lighting direction, Leonardo AI will vary the light source between generations, and visually mismatched lighting across a character roster is one of the details players notice consciously. The Image Guidance workflow is what locks this in at the platform level rather than relying on the model to self-regulate.
How to Adapt It: For a fantasy card game with rarity tiers, add a rarity signal to each character: “heroic gold trim and glowing accents, legendary tier visual weight” for an epic-rarity character, or “simple costume, no glow effects, muted tones” for a common. Keep the class descriptor constant and let rarity signals control visual complexity.
5 Prompt 5: The Enemy and Boss Character
Enemy design is a genuinely different creative problem from hero design. Players need to read an enemy’s threat level, attack pattern, and role in the game’s ecosystem at a glance, which means silhouette design, size signaling, and weapon visibility matter more than fine detail. A great enemy sprite communicates “this thing will hit you hard and slowly” or “this thing will swarm you in numbers” within the first half-second of appearing on screen.
Leonardo AI handles enemy characters well when you explicitly encode the threat communication in the prompt. The prompt below uses size and posture signals rather than relying on generic “scary” descriptors, which tend to produce visually incoherent results.
Why It Works: The three-tier threat system encoded directly in the prompt is the structural choice that makes this work. Rather than writing a single “scary enemy” prompt and hoping for the right output, the prompt forces a specific size and visual weight decision upfront. “2x hero height” for boss characters is surprisingly effective, Leonardo AI interprets relative size instructions when they are specific and measured rather than subjective (“huge,” “massive”).
How to Adapt It: For a wave-based game that needs minion variety, generate four minion-tier enemies using the same color language and art style but different enemy types. The shared color palette creates visual coherence between different enemy designs without requiring identical anatomy.
6 Prompt 6: The Character Turnaround Reference
Think about what a 3D modeler or animator actually needs from a character reference sheet. Not a dramatic portrait, a clinical, evenly lit, front-back-side view that shows every plane of the costume at the same scale. This is one of the hardest things to get from any AI art tool, and Leonardo AI handles it imperfectly, but better than most competitors when you prompt specifically for the format.
The secret is treating the turnaround request as a layout instruction rather than a character description. Most users describe the character and add “show all four views” at the end. Leonardo AI needs the layout described first and the character described second, the reverse of how most people write prompts.
Why It Works: Leading with “horizontal layout, white background, four views left to right” before any character description establishes the compositional grammar before Leonardo AI has a chance to settle on a single-character portrait layout. The T-pose instruction is essential for anyone using the output as a 3D modeling reference, action poses obscure anatomy and proportions that modelers need to see clearly.
How to Adapt It: For a fighting game, generate a six-view sheet by changing “four views” to “six views: front / front-right / right / back / back-left / left” and setting the aspect ratio to 21 by 9. Use the result as a reference for building a 3D model’s UV unwrap orientation.
7 Prompt 7: The Costume Variant Generator
That third prompt is doing something subtle that the others do not: it establishes a character before generating any art. This advanced workflow uses Leonardo AI’s Image-to-Image feature as the first step, you generate a base character, then use that image as a reference to generate costume variants. The result is multiple outfit designs on the same recognizable character rather than what you get if you simply describe different costumes, which is effectively different characters wearing those costumes.
This is the correct workflow for games with character customization systems, unlockable outfits, seasonal content, or DLC costume packs. The character’s face, proportions, and personality carry across each variant in a way that looks intentional rather than incidental.
Why It Works: The “maintain” instruction line is the load-bearing component of this prompt. Without explicitly listing what should not change, face, proportions, hair, art style, Leonardo AI treats the costume change as a full character redesign. The Image Strength setting of 0.45 is a tuned value: lower (0.2 to 0.3) locks the character too tightly and prevents real costume changes, higher (0.6 plus) introduces character drift that defeats the purpose of the workflow.
How to Adapt It: For a seasonal event where you need holiday costume variants of an existing character, swap the costume description for “festive winter version: warm coat, scarf, seasonal accessories, same base character design.” The workflow is identical, only the costume descriptor changes.
8 Prompt 8: The Expression Sheet
Expression sheets, a character shown across 6 to 8 emotional states, are essential for dialogue-heavy games and visual novels. They are also one of the most technically demanding requests you can make of an AI art tool, because maintaining a consistent face across multiple emotional expressions is genuinely hard for diffusion models. Leonardo AI handles this better than most when you use the right workflow.
Most tutorials skip this part entirely: the key to expression sheets in Leonardo AI is not prompting all expressions in one image, which reliably produces inconsistent results, but using its ControlNet Depth feature to lock the head pose while varying the expression. This requires a slightly more involved setup, but the output quality difference is substantial.
Why It Works: ControlNet Depth locks the three-dimensional head structure, the position of eyes, nose, and mouth relative to each other, while allowing surface changes like expression. Without it, Leonardo AI is essentially guessing which facial features to preserve. “High emotion readability” is a useful direction note, it pushes the model toward exaggerated expression rather than subtle realism, which reads better at the small portrait sizes most games use.
How to Adapt It: For an anime-style visual novel, switch to the Leonardo Anime XL model and add “anime expression style, large eyes, exaggerated reaction” to the prompt. The ControlNet Depth workflow is style-agnostic, the structural approach works regardless of which base model you use.
9 Prompt 9: The LoRA Training Reference Generator
None of this comes free, training a custom LoRA model on Leonardo AI requires generating a high-quality reference dataset first. But once you have that model trained, every subsequent character you need in that style takes minutes rather than hours. This prompt is designed specifically to generate the 15 to 20 training images Leonardo’s LoRA trainer needs to learn your character’s visual identity.
The structure of this prompt is unlike the others in this guide. Rather than producing one perfect image, the goal is producing a diverse set of consistent images, different angles, different contexts, the same character, that collectively teach the LoRA trainer what is essential about this character’s appearance and what is incidental.
Why It Works: The LoRA training process learns by identifying what is consistent across your dataset. If your training images vary the lighting, art style, or character details, the model learns those inconsistencies as part of the character identity, which produces a broken LoRA that generates different-looking characters every time. This prompt structure locks every variable that defines the character while deliberately varying the view and context, which is exactly what the training process needs to learn a robust representation.
How to Adapt It: For a character that appears in different emotional states throughout your game, add 4 to 5 expression variations to the training set using Prompt 8’s workflow. LoRAs trained on expression-varied datasets produce more versatile in-game generation results than those trained on neutral-only images.
10 Prompt 10: The Complete Character Bible Entry
This is the master prompt, the one that combines role assignment, character context, visual constraints, output format specification, and iteration instructions into a single structured generation workflow. It is not a single prompt you paste and run once. It is a production workflow that uses Leonardo AI’s full feature set, Image Guidance, Canvas, batch generation, and LoRA, to produce everything a game production team needs to build a character: reference sheet, expression variants, costume alternatives, and a size chart relative to other characters.
Use this when you are starting a new major character from scratch and need to produce a complete character package rather than individual assets. It is the closest thing to a generative art director workflow that Leonardo AI currently supports.
Why It Works: The sequential structure of this workflow is the design choice that makes it succeed. Each step uses output from the previous step as a reference, which means consistency compounds across the full character package rather than being independently negotiated in each generation. The role-assignment opening, “You are generating a complete character reference package,” is a meta-instruction that frames the intent for the operator (you) rather than the AI, but it serves as a useful checklist anchor when producing 15 plus images across multiple Leonardo features.
How to Adapt It: For a roster of characters rather than a single character, complete Steps 1 and 2 for all characters first before doing expressions or costume variants. This ensures your full roster is established before you invest time in character-specific detail work, a character that does not fit the roster can be cut before the expression and costume work is done, rather than after.
Common Mistakes and How to Fix Them
The problem most people run into is not writing bad prompts, it is writing prompts that fight Leonardo AI’s defaults without knowing what those defaults are. The mistakes below are the patterns that show up repeatedly once you spend real time testing the tool for game character production.
| Mistake | Wrong Approach | Right Approach |
|---|---|---|
| Background interference | Describing a character without addressing the background, then spending 20 minutes removing it in Photoshop | Always include “white background” or enable Transparent Background in settings before generating any character intended for game use |
| Ignoring model selection | Using the default Leonardo Diffusion XL model for everything because it is preselected | Phoenix v1 for painterly or stylized characters, Kino XL for cinematic realism, Anime XL for anime-style, match model to style before prompting |
| Describing instead of directing | “A mysterious and powerful warrior with a dark past wearing ancient armor”, character lore, not visual direction | “Front-facing warrior, heavy plate armor with cracked visor, muted steel and deep crimson color palette, battle-worn, brooding expression”, visual specifics only |
| Skipping Image Guidance for consistency | Generating multiple class variants from the same text prompt and accepting the visual drift between them | Generate the first character, then use that image as Image Guidance at 0.4 strength for every subsequent variant, this locks the visual grammar far more reliably than text alone |
| Overprompting with contradictions | “Hyperrealistic, painterly, cartoon, pixel art, detailed fine texture, minimalist”, conflicting style signals in one prompt | Choose one primary style descriptor and one modifier: “hand-painted, semi-realistic” or “flat vector, bold shapes.” Leonardo performs worse, not better, with more style instructions |
“The most expensive prompt mistake in game character generation is the one you make on Prompt 1 and then replicate across 40 characters before realizing the style is wrong for your engine’s resolution.”
Common lesson from solo game developers using AI art pipelines
What Leonardo AI Still Struggles With
Hands. That is the honest starting point for Leonardo AI’s limitations with game characters in 2026. Hand anatomy, particularly hands holding weapons, casting spells, or shown in close-up, remains the most frequent failure mode across all model versions tested. The Phoenix model is significantly better than earlier iterations, but you will still encounter merged fingers, anatomically implausible grip positions, and weapon and hand intersection artifacts on a meaningful percentage of generations. The practical workaround most game developers use is generating characters with hands in low-visibility positions, gripping a weapon at the side rather than raised, or using a three-quarter pose where the off-hand is partially occluded, and flagging any close-up hand view for manual touch-up.
Consistent face generation across a long production run is a second genuine limitation. Not within a single session, where Image Guidance helps significantly, but across sessions or after Leonardo AI updates its base models. A character whose face was locked in with Image Guidance in January may generate slightly differently by March after a model update, even with identical settings. For production pipelines where face consistency is critical, a protagonist who appears in hundreds of UI contexts, the only reliable solution is training a LoRA on Leonardo AI or using an entirely offline workflow with a frozen local model. Depending on the platform for long-term face consistency is a risk that experienced users account for explicitly.

Full-body proportions at small sprite sizes are the third area where Leonardo AI falls short for certain game types. The tool generates characters at high resolution beautifully, but when those characters are scaled down to actual game resolution, 32x64px, 64x128px, the fine detail that looked great in the preview becomes visual noise. For pixel-critical sprite work, the honest answer is that Stable Diffusion with a purpose-trained pixel art LoRA is still a better tool, even accounting for the setup overhead. Leonardo AI’s pixel art output is usable for mockups and early prototyping, but it rarely meets the bar for a shipped pixel art game without significant manual touch-up.
The Skill Behind the Prompts
What you have picked up working through these ten prompts is not a list of phrases to copy, it is a way of thinking about AI art direction. Every prompt here works because it makes an explicit decision about what to control and what to leave to the model, and because it accounts for Leonardo AI’s specific defaults rather than treating it as a generic image generator. That distinction, understanding the tool’s defaults and structuring your prompt to redirect them, is what separates game developers who get production-ready output from those who spend hours in cleanup for every asset they generate.
There is a broader principle at work here that applies well beyond Leonardo AI. Every AI tool has a gravity, a direction it pulls toward when your instructions are ambiguous. Good prompting is not about writing more words. It is about identifying where that gravity conflicts with what you need and applying just enough force, in just the right direction, to redirect it. The Image Guidance workflow, the negative prompt strategy, the model selection logic, all of these are tools for redirecting the model’s gravity toward your actual production requirements.
That said, prompt engineering for game characters cannot replace visual judgment. Leonardo AI cannot tell you whether a character’s color palette will read well against your game’s environment, whether an enemy silhouette is distinct enough from the player character, or whether the expression on an NPC’s face actually communicates the right emotional information for that moment in your story. Those calls still require a human with context, taste, and knowledge of the game’s full visual system. The prompts in this guide are tools for reducing the gap between your creative intent and the model’s output, not for replacing the intent itself.
Leonardo AI’s trajectory over the next 12 to 18 months points toward tighter character consistency through improved reference locking, native integration with game engine asset pipelines, and more reliable multi-character coherence in single generations. When those features land, the most important skill will not be knowing the new prompts, it will be having a mental model of your game’s visual language clear enough to direct any tool toward it. The developers building that clarity now will be significantly faster and more effective when those tools arrive.
Try These Prompts Right Now
Every prompt in this guide works on Leonardo AI’s free plan, you get 150 tokens daily, enough to test all 10 prompts before deciding whether to upgrade. Open Leonardo AI, select Phoenix v1, and start with Prompt 1.