
Complete Guide
Luma AI 3D Scene Capture Complete Guide 2026
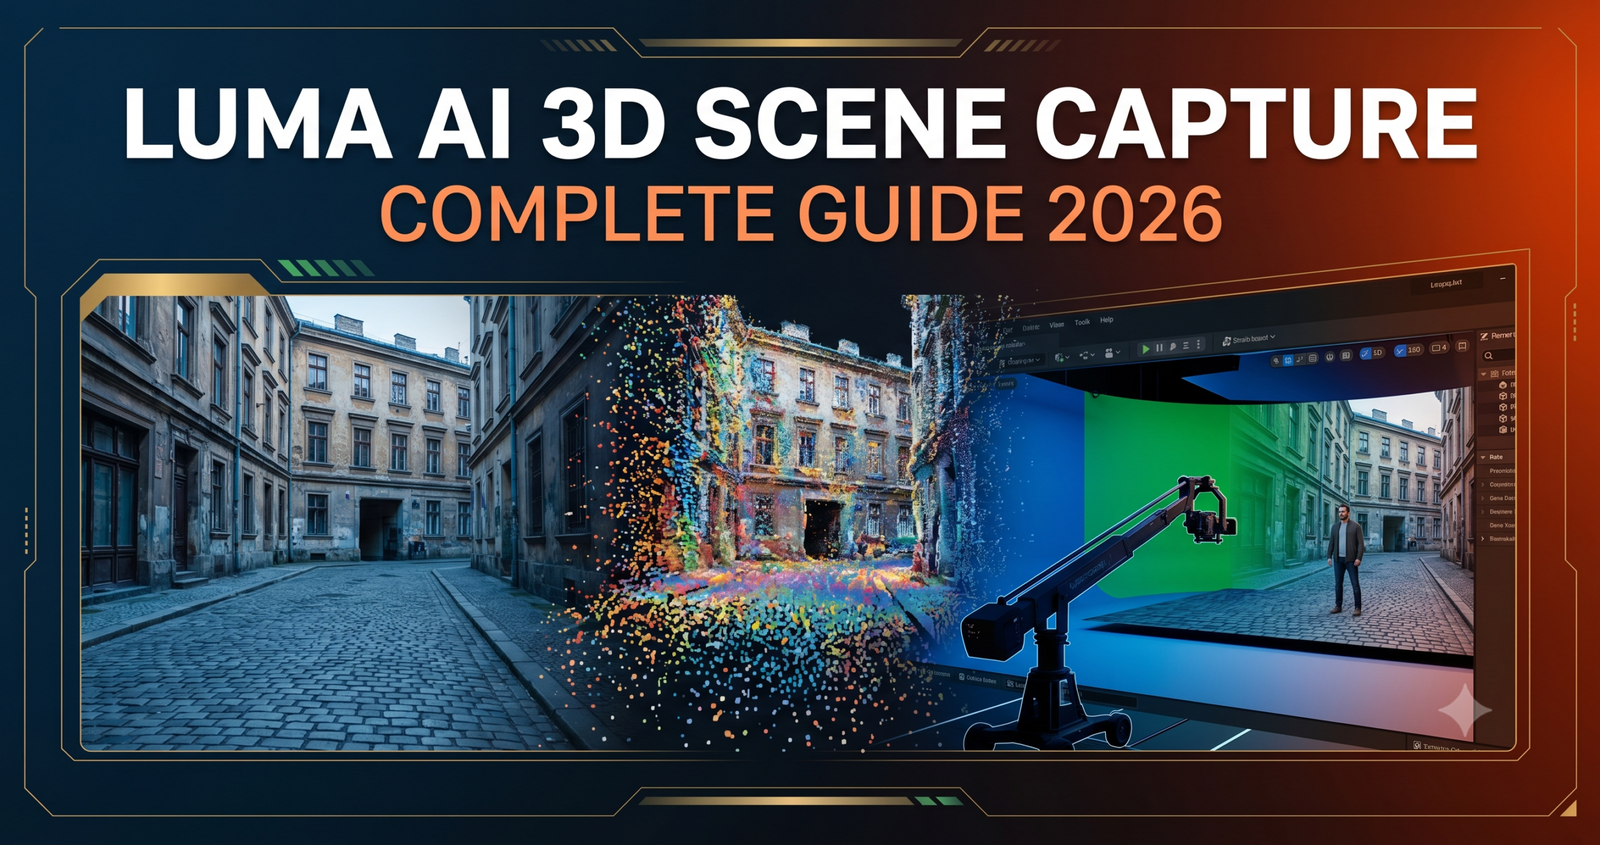
Luma AI’s scene capture technology sits at the intersection of two research threads that matured simultaneously, Neural Radiance Fields, which reconstruct volumetric 3D scenes from collections of photographs, and Gaussian Splatting, which represents scenes as millions of small oriented ellipsoids that can be rendered in real time. The combination gives Luma AI the ability to produce captures that look photorealistic from any viewpoint within the captured region and render fast enough to navigate interactively or import into a game engine. Both of those properties matter for different reasons, and this guide covers how to use the technology well for both.
What this guide covers from beginning to end is the complete capture-to-output workflow. Planning a capture session for a specific end goal. Filming technique that produces the coverage Luma AI’s reconstruction algorithm needs. The specific settings and upload configuration that match different scene types. How to read the reconstruction output and identify whether your capture succeeded or needs to be redone. Exporting for web embedding, video rendering, Unreal Engine integration, and reference mesh extraction. And where Luma’s Genie text-to-3D feature fits into a broader 3D content pipeline alongside captured scenes.
We have run over sixty capture sessions across interior and exterior environments, objects at different scales, and challenging lighting conditions specifically to find where the technology works and where careful planning is required. The ten steps in this guide reflect what we learned across those sessions.
How Luma AI’s Reconstruction Actually Works
You do not need to understand the mathematics of NeRF reconstruction to use Luma AI well. You do need to understand the physical intuition behind it, because that intuition directly determines what filming approach produces good results.
Luma’s reconstruction algorithm treats your video frames as a collection of photographs taken from slightly different positions. For every point in 3D space within your scene, it tries to answer one question from each viewpoint that can see that point, what color and density does this point appear to have? When enough viewpoints agree on the color and density of a point, the reconstruction becomes confident about that part of the scene. When viewpoints disagree, or when a region of the scene appears in too few frames, the reconstruction fills in that region with an interpolated guess that often looks blurry, floaty, or wrong.
The practical implication is direct. Every part of your scene that you want to look good needs to appear in multiple video frames from multiple angles with enough overlap that the algorithm can triangulate its position confidently. Areas you film from only one angle or that appear only briefly look worse than areas you circle carefully and film from many positions. Moving through a scene quickly produces frames that are too similar to each other in terms of viewpoint change, which reduces the triangulation quality. Moving too slowly produces motion blur that degrades individual frame sharpness. The right filming pace is deliberate and smooth, with a consistent relationship between camera speed and the amount of detail in the scene.
Key Takeaway
Luma AI’s output quality is almost entirely determined by your filming technique. The reconstruction algorithm is sophisticated but it cannot invent scene information that your footage did not provide. Every hour spent learning to film correctly produces better results than any amount of time spent adjusting settings inside the Luma interface after the fact.
What Luma AI Is the Right Tool For, and What It Is Not
Before the ten-step guide, a clear scope map saves you from investing time in a workflow that is not suited to your actual goal.
Virtual Production Backgrounds
Real-world locations reconstructed as Unreal Engine environments for filming against. Luma’s Unreal plugin makes this pipeline direct and the visual quality at camera distances is excellent.
Location Scouting and Visualization
Capturing a real location so a remote team can explore it virtually before committing to a shoot. The interactive viewer preserves the spatial relationships a 360 photo cannot.
Product and Object Visualization
Capturing a physical product or artifact for web embedding, e-commerce 3D display, or archive. Object captures are Luma’s most forgiving category for beginners.
Cinematic Camera Path Rendering
Flying a virtual camera through a captured space to produce a video that would be impossible to film physically. Especially useful for architectural visualization.
Game Environment Reference
Capturing a real space to use as visual reference while building a game environment. Useful but the non-standard geometry format limits direct asset pipeline use.
Rough Mesh Extraction
Extracting a polygon mesh from a Luma capture for use in a 3D pipeline. Works for simple objects and architectural elements. Unreliable for complex organic forms.
Animatable Character Scanning
Luma does not produce meshes with topology suitable for character animation. Use a dedicated photogrammetry or structured light solution for scanned character work.
Real-Time Game Environments
Gaussian splat scenes are not standard game geometry. Placing NPCs, collision, and game logic into a Luma capture requires conversion workflows that currently lose significant quality.
The 10-Step Luma AI Scene Capture Workflow
The single most useful thing you can do before picking up a camera is decide specifically what the Luma output will be used for. This sounds like obvious planning advice but it has direct technical consequences for how you film. A capture intended for interactive web embedding prioritizes full 360-degree coverage of a space. A capture intended for a specific cinematic camera move only needs dense coverage along the planned camera path. A product capture for an e-commerce viewer needs coverage of the underside and back of the object. A virtual production background needs dense coverage of the specific wall or environment behind where the actor will stand.
Each of these goals implies a different filming route, a different amount of time spent on different parts of the scene, and a different quality threshold for which areas can be undersampled. Deciding this upfront prevents the most common beginner mistake, filming a space comprehensively for no specific purpose and ending up with a capture that does everything adequately and nothing particularly well.
Ask yourself: What is the final output format? (video, interactive viewer, Unreal scene, mesh export), Which parts of the scene will actually be seen?, How close will the virtual camera get to surfaces?, Does the reconstruction need to be navigable by someone else or just me? Answering these shapes every decision that follows.
Sketch your intended camera path or the portion of the scene that needs highest quality before arriving on location. Marking this on a floor plan or satellite image means you spend filming time where it matters rather than discovering mid-session that you under-covered a critical area.
Luma AI accepts video from any device capable of producing stable, sharp footage, modern smartphones, mirrorless cameras, DSLRs, and action cameras all work. The meaningful differences between devices come down to two factors, optical image stabilization quality and lens distortion characteristics.
A modern iPhone or flagship Android phone with strong optical stabilization and a well-characterized camera model performs excellently for most Luma captures. The Luma mobile app handles camera calibration automatically for known phone models, which removes a source of error that manual upload requires you to address. For demanding captures, large architectural spaces, challenging low-light interiors, or scenarios where maximum resolution matters, a mirrorless camera on a gimbal produces higher quality input that the reconstruction algorithm can use more effectively.
Avoid using wide-angle or fisheye lenses without explicit distortion correction. Heavy lens distortion introduces systematic errors into the camera pose estimation that produces specific failure modes, curved straight lines in the reconstruction, scale inconsistencies across the scene, and poor alignment between overlapping regions. Standard focal lengths between 24mm and 50mm equivalent perform most reliably.
Lock exposure, auto exposure causes apparent brightness changes between frames that confuse reconstruction. Lock white balance for the same reason. Disable HDR video mode, HDR footage tone-maps differently per frame and breaks frame-to-frame consistency. Set shutter speed to twice the frame rate minimum. Record at 4K 30fps for most captures or 1080p 60fps for fast-moving object captures.
Do a thirty-second test capture of a small section of your scene and upload it as a quick test before filming the full session. Processing a small clip takes under ten minutes and tells you whether your lighting, exposure settings, and filming pace are producing usable input before you commit to the full capture.
Lighting is the most frequently underestimated variable in scene capture quality. Luma’s reconstruction is performing a visual consistency check across your video frames, it works by finding the same point in the scene across multiple frames and comparing what it looks like. Anything that makes a point look different between frames degrades that consistency check, and lighting change is the most common culprit.
The ideal capture lighting is overcast outdoor light, soft, directionless, and stable across the duration of a capture session. Direct sunlight creates strong shadows and specular highlights that shift as you move around a scene, which appears to the reconstruction algorithm as inconsistent surface color. Clouds moving across the sun during an exterior capture are one of the most reliable ways to produce a poor result even with excellent filming technique.
For interior captures, consistent artificial lighting with no daylight contribution from windows works well. Mixed lighting where some areas are lit by daylight coming through windows and other areas are lit by artificial ceiling lights produces color temperature inconsistency that shows up as color banding in the reconstruction. If you cannot eliminate daylight from an interior capture, film it either early morning or late evening when the contribution from outside is minimal and consistent in direction.
Exterior: Overcast preferred, if sunny, complete the capture within 30 minutes before shadow direction shifts significantly. Interior: Close all blinds and curtains, rely on artificial lighting only. Avoid: moving light sources (ceiling fans with lights, candles, car headlights passing windows). Check for: highly reflective surfaces, mirrors, polished floors, and glass panels cause reconstruction artifacts and may need to be masked or reframed.
Reflective surfaces like mirrors create a specific failure mode where Luma tries to reconstruct the reflected scene as if it were real geometry behind the mirror surface. Cover mirrors with a matte material during capture if the reflection will not be part of your final output. If the mirror reflection is important to your scene, plan the filming route to minimize angles where the mirror reflection changes significantly between frames.
Different scene types require fundamentally different filming patterns. Using the wrong pattern for your scene type is the most common reason technically competent filmmakers produce poor Luma captures.
For object captures, a product, a sculpture, a vehicle, any bounded three-dimensional object, film in overlapping rings around the object. Start at eye level and walk a complete circle, moving slowly enough that adjacent frames overlap by at least seventy percent. Then tilt the camera downward to a roughly forty-five degree angle and repeat the circle. Then move lower and film another circle aimed upward at the object’s underside. This three-ring approach provides coverage from above, level, and below that gives the reconstruction the full 360-degree information it needs.
For room interior captures, the filming pattern is a series of overlapping outward-facing spirals. Stand in the center of the room and turn slowly, then move to one wall and face inward, walking along the perimeter while keeping the room visible. Pay particular attention to corners, they are areas where two walls and a ceiling or floor meet, creating geometry that is harder to reconstruct and that the algorithm needs more frames to handle well. Pause in each corner and make a slow deliberate arc with the camera before moving on.
For large outdoor environments, think in terms of coverage grids. Walk parallel paths across the space, then cross-walk paths perpendicular to those. Maintain consistent altitude for the horizontal passes, then vary altitude if the terrain has significant elevation change. For architectural facades, walk parallel to the surface at a consistent distance while filming it at a slight upward angle, then repeat at a higher elevation if a drone is available.
Move at a pace where adjacent frames have roughly 70 percent overlap in content, for most scenes this is a slow, deliberate walk. Never pan the camera while stationary, move the camera position instead. Never zoom during a capture, zoom changes focal length which breaks camera calibration. Always keep the subject filling at least 40 percent of the frame, subjects that appear tiny in the frame provide insufficient reconstruction information.
For any object or scene element you want to look particularly sharp, film a dedicated close-up pass after your general coverage pass. Get the camera within one to two feet of surfaces with fine detail, wood grain, stone texture, fabric weave, and move slowly across them. This supplemental close-up footage gives Luma the high-resolution information it needs for those surfaces without requiring you to film the entire scene at close range.
Two categories of scene elements require specific handling during capture because they violate the static-world assumption that reconstruction algorithms depend on.
Moving elements, people walking through the scene, vehicles, blowing foliage, flowing water, appear in different positions in different frames and cannot be reconstructed into coherent geometry. Luma’s algorithm treats them as noise and attempts to exclude them from the reconstruction, but significant moving elements during a capture reduce the effective frame count available for the static portions of the scene and can introduce ghosting artifacts. The practical advice is to clear people and obvious moving objects from the scene before filming where possible. For inherently dynamic elements like trees in wind or water features, film during calm conditions or accept that those elements will reconstruct with reduced quality.
Difficult surfaces require specific attention. Transparent surfaces like glass windows and water surfaces break the assumption that a surface has a consistent color from all viewing angles, because what you see through glass depends on your viewing position. Luma reconstructs the glass surface itself inconsistently and often places geometry at the wrong depth. Highly specular surfaces, polished metal, car bodywork, mirrors, create bright highlights that shift with viewing angle and produce similar problems. Both categories are best handled by framing them to be partially in the background rather than the subject of close-up coverage.
Glass windows: Film at an angle that minimizes reflections, morning or overcast light helps. Apply polarizing filter if using a camera that accepts one. Mirrors: Cover or avoid direct framing. Highly reflective floors: Film from a higher angle to minimize the footprint of the reflection visible in each frame. Moving water: Accept artifacts or mask in post.
If your scene has unavoidable moving elements, a busy street, a populated interior, film multiple passes at different times. Luma’s multi-video upload option allows you to combine footage from separate sessions if the lighting and camera calibration are consistent between them. Areas where a person blocked the view in one session will be covered by frames from the other session where that area was clear.
The upload and configuration step inside Luma AI involves fewer decisions than the filming step, but the decisions that exist have meaningful consequences for reconstruction quality and output usability.
Scene type selection tells the reconstruction algorithm which assumptions to apply. The Indoor, Outdoor, and Object presets adjust parameters around expected scale, depth range, and coverage pattern in ways that improve results when the preset matches your actual scene. Selecting Indoor for an outdoor architectural capture produces a reconstruction that looks compressed and slightly wrong in its depth relationships. Using Object mode for a room-scale interior produces coverage gaps in the ceiling and floor because the algorithm deprioritizes those areas.
The capture quality setting affects processing time and output resolution. Standard quality processes faster and produces output appropriate for web viewing and exploratory use. High quality takes significantly longer but produces output suitable for close-up rendering and professional deliverable work. The difference in processing time is typically between twenty minutes and two hours depending on scene complexity and footage length. For any capture you intend to use in a professional context, High quality is the correct setting regardless of the time cost.
Scene type: match to actual environment, Capture quality: High for professional output, Standard for quick evaluation, Camera model: select your specific phone or camera model if listed, Capture title: include location, date, and intended use for your own library management, Privacy: set to private for any commercial or client work before uploading.
If your video file is very large, over 5GB is common for 4K footage of large spaces, trim your video to remove the walking sections at the start and end of the capture before uploading. The frames where you were walking to the starting position and away from the ending position provide no useful scene information and add processing time and potential confusion to the reconstruction.
When processing completes, your first action in the viewer should be a systematic quality evaluation before doing any editing, exporting, or sharing. There are four things to assess.
Sharpness across the scene tells you whether your footage had sufficient frame overlap and stability. Areas that look blurry or have a cotton-wool texture indicate regions where the reconstruction lacked enough well-separated viewpoints to triangulate confidently. Compare these areas to your filming notes, they should correspond to parts of the scene you covered less thoroughly.
Geometry accuracy is visible by looking at straight lines, wall edges, door frames, floor-ceiling junctions. These should appear straight in the reconstruction. Curved straight lines indicate camera calibration issues, typically from lens distortion that was not properly accounted for. Floating or disconnected geometry typically indicates a moving element the algorithm partially incorporated into the reconstruction rather than excluding.
The coverage boundary marks where the reconstruction ends. Fly the camera in the viewer toward the edges of the captured area and observe whether the scene degrades gradually or drops off sharply. A gradual degradation is normal and expected. A sharp boundary with good quality right up to the edge indicates excellent coverage. Regions where the coverage boundary intrudes significantly into the main area of the scene indicate filming gaps you would address in a reshoot.
Sharpness, are surfaces within two meters of the intended camera path acceptably sharp? Geometry, are straight architectural lines straight in the reconstruction? Coverage, does the useful area extend as far as needed? Artifacts, are there floating geometry elements or obvious reconstruction failures in important areas? If two or more of these fail, reshoot before investing time in export workflows.
Use Luma’s crop and mask tools to remove reconstruction artifacts at the scene boundaries before exporting or sharing. The edges of a scene almost always have lower quality than the center, and cropping them out produces a cleaner final output regardless of whether the viewing format is interactive or video.
Luma AI’s most straightforward output path is video export, you define a camera path through the scene using keyframes in the viewer, set the output resolution and frame rate, and render a video file that flies through your captured space. The render quality for this output exceeds what you could achieve by physically filming the same path because the virtual camera moves with perfect stability and can take paths that are physically impossible to film.
Camera path design in Luma’s keyframe editor rewards deliberate composition. Each keyframe is a specific position and viewing direction in the scene, and Luma interpolates a smooth path between them. For cinematic outputs, think of each keyframe as a compositional beat, the opening frame should establish the space clearly, intermediate frames should guide the viewer’s attention through interesting elements, and the closing frame should land on a visually satisfying composition. The path speed is controlled by the timing between keyframes rather than a separate speed parameter.
Web embedding through Luma’s iframe embed code allows interactive 3D scene viewing on any webpage without requiring the viewer to install anything. The interactive viewer runs entirely in the browser using WebGL and handles the Gaussian splat rendering client-side at frame rates that are acceptable on modern hardware. For portfolio sites, architectural presentations, and product pages where the visitor benefits from exploring a space themselves, the interactive embed is significantly more engaging than an equivalent video.
Resolution: 4K (3840x2160) for professional deliverables, 1080p for web and social, Frame rate: 24fps for cinematic feel, 30fps for presentations, Format: MP4 H.264 for broad compatibility, ProRes for post-production, Camera path: plan at least 5 keyframes per 10 seconds of output for smooth motion, Render time estimate: roughly 1 to 3 minutes per second of output at 4K quality.
For client presentations, render a looping video that plays three to five times longer than your intended use rather than cutting it exactly to length. Having a longer render means the client can watch it multiple times without an obvious loop point and gives you options for trimming in a video editor without needing to re-render from Luma.
Luma AI’s Unreal Engine plugin brings captured scenes directly into UE5 as Gaussian splat actors that render natively in Unreal’s rendering pipeline. This is the workflow that virtual production teams are using to shoot actors against real-world locations without physically traveling to them, and it is the application area where Luma AI’s quality advantage over traditional 360 photo backgrounds is most visible in the final output.
Installing the Luma plugin and connecting your Luma account inside Unreal allows you to browse and import your captures directly from within the editor. Once imported, the Gaussian splat scene appears as a placeable actor with a position, rotation, and scale that you match to your virtual camera setup. The scene updates in the Unreal viewport in real time as you move the camera, which is the property that makes it genuinely useful for virtual production rather than just as a static backdrop.
Lighting integration is the most important workflow decision in a virtual production context. Luma’s captured scenes contain baked lighting from when the scene was filmed, the sun position, the shadow directions, and the ambient light level are all fixed in the capture. Unreal’s dynamic lighting exists on top of this baked scene. Matching the direction and color temperature of Unreal’s directional light to the baked lighting in the Luma capture is the task that determines whether your virtual production composite looks credible or looks like two separate environments. Luma provides HDRI exports of the scene’s lighting environment specifically to help with this matching.
1. Install Luma AI plugin from Unreal Marketplace, 2. Connect Luma account via plugin settings, 3. Browse and import target capture, 4. Scale scene to match real-world dimensions using known reference measurements, 5. Export HDRI from Luma viewer, 6. Import HDRI as sky light in Unreal, 7. Match directional light angle to baked shadow direction in capture, 8. Configure nDisplay or in-camera VFX settings for live composite if needed.
Include a known-size reference object in your capture, a chair of known dimensions, a tape measure laid on the floor, a standard doorframe, so you can accurately scale the imported scene in Unreal to real-world units. A scene scaled incorrectly produces subtle perspective mismatches between foreground actors and background scene that the eye detects before the brain identifies exactly what is wrong.
Luma’s Genie feature generates 3D objects from text descriptions, separate from the scene capture pipeline but directly complementary to it. If your captured scene needs an object that was not present when you filmed it, Genie can generate a 3D mesh that you place into the scene either in the Luma viewer or in your downstream application.
The most practical applications are adding objects that could not be in the real space during filming, a fantasy artifact for a game pre-visualization, a piece of furniture that was not available on the shooting day, a branded product placement object, or a CG character asset for a previz scene. Genie’s output quality for hard-surface objects is good enough for these purposes at the distances and resolutions typically involved in previz and virtual production work.
Placing Genie objects into a Luma scene in a way that looks credible requires matching three things, scale, position relative to ground plane, and shadow direction. Scale is handled by comparing the generated object against reference objects in the capture, place a Genie chair next to a real chair in the capture to evaluate whether the proportions are correct before committing to the placement. Ground plane positioning requires finding the exact Y-axis value that places the object’s base flush with the captured floor rather than floating above it or sinking into it. Shadow direction should match the baked shadow direction in the capture, which you read from observing how existing objects in the scene cast shadows.
1. Generate object in Genie with style prompt that matches scene aesthetic, 2. Export as GLB or FBX, 3. Import into downstream application alongside Luma scene, 4. Set scale using reference object comparison, 5. Position on ground plane, 6. Apply shadow-matched lighting from scene HDRI, 7. Add contact shadow pass if compositing in video, 8. Review composite from multiple camera angles before finalizing.
For any Genie object that will appear prominently in a final output, run the Meshy AI texturing pipeline on the exported mesh before placing it into the scene. Meshy’s texturing system produces PBR materials that match physical surfaces more convincingly than Genie’s default texturing, and the two minutes this adds to the workflow is usually visible in the final composite quality.
“A twelve-minute phone capture that is filmed correctly is worth ten times more than an hour of footage that was not. The algorithm is not the variable. The footage is.”
aitrendblend editorial, 2026 Luma AI production workflow testing
Common Mistakes and the Fix for Each
| Mistake | Wrong Approach | Right Approach |
|---|---|---|
| Auto exposure left on | Camera adjusts exposure as filming direction changes, inconsistent brightness between frames corrupts reconstruction | Lock exposure before filming begins and verify it is locked by panning across the scene before starting the actual capture pass |
| Panning instead of translating | Standing in one place and rotating the camera, provides no parallax information, produces poor depth reconstruction | Move the camera position continuously, walk through the space while keeping the camera aimed at the subject |
| Wrong scene type selected | Selecting Object mode for a room-scale interior, algorithm deprioritizes ceiling and far-wall coverage | Match the scene type preset to the actual environment, Indoor for enclosed rooms, Outdoor for open environments, Object for bounded single items |
| Filming too fast | Walking at normal pace, adjacent frames have less than 50 percent overlap in fast-moving scenes | Move deliberately and slowly, in most indoor scenes this means roughly half of a normal walking pace |
| Neglecting scene corners and edges | Walking the perimeter and center but bypassing corners, corners reconstruct poorly without dedicated coverage | Pause at each corner and perform a slow deliberate arc before continuing along the wall |
| Incorrect Unreal scene scale | Importing the splat scene without establishing real-world scale, actors appear to float or sink relative to ground plane | Include a known-dimension object in the capture and use it to calibrate the scene scale in Unreal before placing any virtual objects |
What Luma AI Still Cannot Do Well in 2026
The technology behind Luma AI’s captures has genuine limits that matter for specific use cases, and acknowledging them directly is more useful than discovering them when a project depends on capabilities the tool does not have.
Moving through the reconstruction beyond the filmed boundary fails abruptly. The scene exists only where your footage covered it, and flying the virtual camera outside that boundary produces a sharp quality drop or outright blank space. For virtual production where an actor might move toward a background wall that was at the edge of your filming range, this boundary can become visible in the composite. Planning the shooting axis relative to the capture’s densely covered zone prevents this problem, but it requires deliberate coordination between capture planning and shoot planning that does not always happen in practice.
Scene modification after capture is not currently possible in any meaningful sense. You cannot remove a real-world object from the scene, change the lighting conditions, alter the time of day, or add geometry to the environment within the Luma capture itself. What you captured is what you have. Additions must be made as separate 3D objects placed into the scene in a downstream application, they do not become part of the Luma representation and must be composited at render time.
Mesh extraction quality for complex organic forms remains unreliable. Luma can export a polygon mesh from any capture, but that mesh is derived from the NeRF volume or splat representation rather than being the primary data format. For architectural and hard-surface environments the mesh extraction is reasonable for reference use. For organic scenes with trees, foliage, fabric, or complex surface detail, the extracted mesh is dense, irregular, and lacks the clean topology required for any downstream 3D work beyond rough blocking. Do not plan a workflow around extracting clean production meshes from Luma captures of natural environments.
Large outdoor scenes with significant depth range, a city block, a landscape, an airfield, push against the limits of what the reconstruction algorithm can handle from phone-captured video. The depth estimation at long ranges is less accurate than at close ranges, and the sheer volume of footage required to adequately cover a large outdoor space at high quality can exceed practical capture and upload constraints. For large-scale outdoor scene capture, dedicated photogrammetry workflows using drone footage and purpose-built software remain better suited than Luma AI’s current pipeline.
What is coming in the next year that will change these limits is worth watching. Luma’s research team has published work on dynamic scene reconstruction, capturing scenes with moving elements and separately reconstructing the static background from the dynamic foreground. When that capability arrives in the production product, the restriction against moving people in your capture scene will effectively be removed. The scene modification capability is another area of active development, with early prototypes showing the ability to remove objects from existing captures and infill the resulting gaps with plausible scene content. Both of these features would address the current tool’s most significant practical limitations.
For what it can do today, the workflow in this guide represents the current best practice across sixty-plus capture sessions and several months of production use. The technology is genuinely impressive within its scope, and the scope is large enough to be useful for a meaningful range of professional applications. Film correctly, match the tool to the right task, and Luma AI in 2026 earns a permanent place in any visual production workflow that involves real-world locations.
Capture Your First Scene Today
Luma AI’s free tier lets you run complete capture sessions and view full-quality reconstructions. Follow the filming technique in Step 04 of this guide on your very first attempt and compare the result to anything you might have captured without it.
This guide was developed through independent capture testing by the aitrendblend editorial team across more than sixty Luma AI sessions conducted between January and June 2026. All workflow recommendations reflect our findings across indoor, outdoor, and object capture scenarios. Luma AI’s platform and features may have changed since publication. This is independent editorial content, we have no commercial relationship with Luma AI or any company mentioned in this guide.
Top tier post, the kind that makes you want to share the link with friends working in the same area, and a stop at thisdomainisabdu only made me more confident in doing that, this site is one of the better resources I have seen on the topic recently across both new and older posts.
Now recognising the specific pleasure of reading writing that shows real care for sentence shapes, and a look at vesseltame extended that craft pleasure, sentence level writing quality is something most blog content ignores entirely and this site has clearly invested in the prose layer alongside the substance which is rare today.
Worth recognising that the post handled a familiar topic without reaching for any of the obvious hot takes, and a stop at trenchtwist continued that fresh treatment, sites that find new angles on subjects others have exhausted are sites worth following carefully and this one has clearly developed that exploratory instinct through patient practice.
Found the section structure particularly thoughtful, and a stop at tritonstyle suggested the same care across the broader site, structural choices guide the reader through the material in ways most people do not consciously notice but feel the absence of when those choices are made carelessly or not at all.
My usual pattern is to skim and bounce but this site has reset that pattern temporarily, and a stop at uptonshade maintained the slower reading mode, content that changes how I read is content with structural influence and this site has clearly nudged my reading behaviour toward something better at least for the duration of these visits.
Honest assessment after reading this twice is that it holds up under careful attention, and a look at wisdomvertex extended that durability across more pages, content that survives a second read without revealing weak spots is rarer than the average reader probably realises and this site clearly cleared that bar.
Honestly slowed down to read this carefully which is not my default, and a look at growthvertexhub kept me in that careful reading mode, the kind of writing that demands attention by being worth attention is rare in a media environment full of content engineered to be skimmed not read with any real focus today.